Useful Windows Commands

Get all the system info

systeminfo

Get RAM details

 Get-CimInstance Win32_PhysicalMemory | Select-Object DeviceLocator, Manufacturer, @{Name="Capacity(GB)"; Expression={$_.Capacity / 1GB}}, ConfiguredClockSpeed

DeviceLocator  Manufacturer Capacity(GB) ConfiguredClockSpeed
-------------  ------------ ------------ --------------------
ChannelB-DIMM0 859B                   16                 2400

Get total expandable RAM

Get-CimInstance Win32_PhysicalMemoryArray | Select-Object MaxCapacity, MemoryDevices

MaxCapacity MemoryDevices
----------- -------------
   33554432             2

Get SSD info

Get-PhysicalDisk | Select-Object FriendlyName, MediaType, HealthStatus, Size

FriendlyName      MediaType HealthStatus         Size
------------      --------- ------------         ----
KINGSTON SNVS500G SSD       Healthy      500107862016

Get OS info

 Get-ComputerInfo | Select-Object OSName, OSVersion, OSDisplayVersion, OSBuildNumber

OsName                   OsVersion  OSDisplayVersion OsBuildNumber
------                   ---------  ---------------- -------------
Microsoft Windows 11 Pro 10.0.26100 24H2             26100

Get motherboard info

Get-CimInstance -ClassName Win32_BaseBoard | Select-Object Manufacturer, Product, SerialNumber, Version

Manufacturer Product SerialNumber      Version
------------ ------- ------------      -------
AZW          SEi     CB1D27211C14S0696 Type2 - Board Version

Get CPU info

 Get-CimInstance Win32_Processor | Select-Object Name, NumberOfCores, NumberOfLogicalProcessors, MaxClockSpeed

Name                                     NumberOfCores NumberOfLogicalProcessors MaxClockSpeed
----                                     ------------- ------------------------- -------------
Intel(R) Core(TM) i5-8279U CPU @ 2.40GHz             4                         8          2400

Get BIOS

Get-CimInstance Win32_BIOS | Select-Object Manufacturer, SMBIOSBIOSVersion, ReleaseDate

Manufacturer SMBIOSBIOSVersion ReleaseDate
------------ ----------------- -----------
INSYDE Corp. CB1D_FV106        8/24/2021 5:00:00 PM

Get networking info

 Get-NetIPAddress -AddressFamily IPv4 | Select-Object InterfaceAlias, IPAddress

List installed software

Get-ItemProperty HKLM:\Software\Microsoft\Windows\CurrentVersion\Uninstall\* | Select-Object DisplayName, DisplayVersion, Publisher | Sort-Object DisplayName

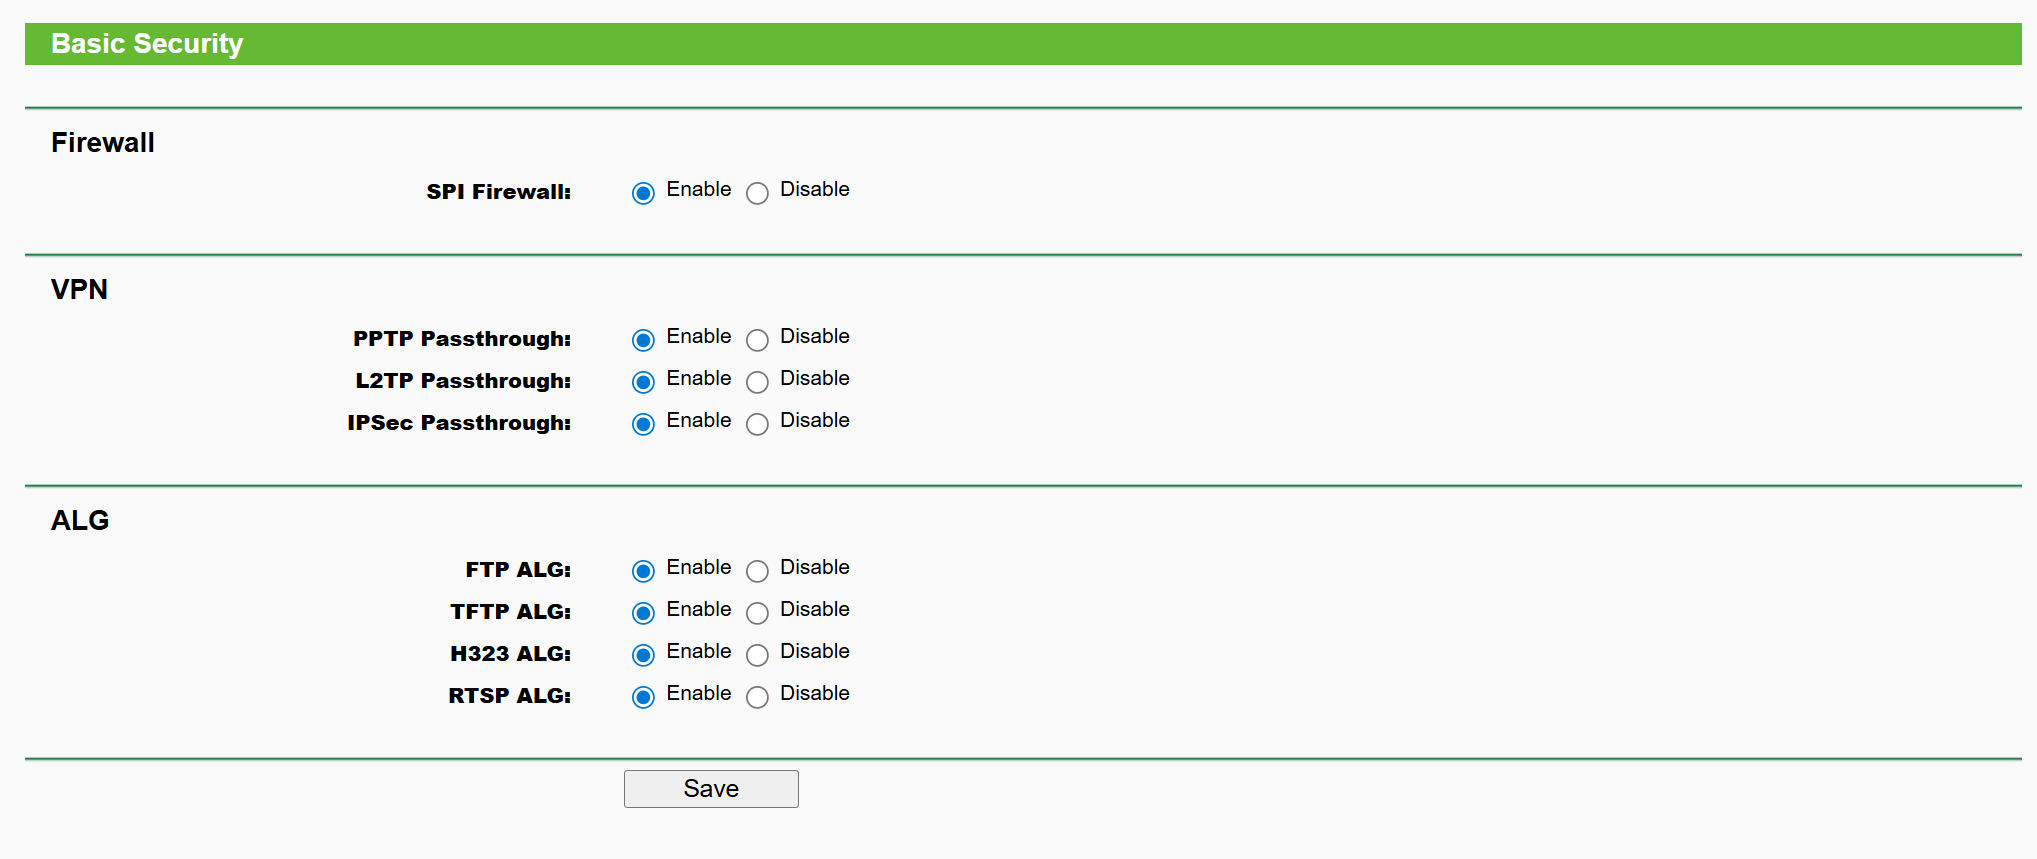
Tip: Do not install wmic. It is deprecated. Use Powershell

List files in directory and order by file size descending (largest file first):

dir /O-S
Posted in Computers, programming | Tagged | Leave a comment

10 Steps to secure your home network

I compiled most of this checklist thanks to ChatGPT. Log in to the router dashboard (typically 192.168.0.1) and from there verify:

1. No Virtual Servers

Forwarding -> Virtual Servers

2. DMZ is disabled

Forwarding -> DMZ

3. No Port Triggering

Forwarding -> Port Triggering

4. SPI Firewall is Enabled

Security -> Basic Security

5. UPnP is disabled

Forwarding -> UPnP

6. Remote Management is off

Security -> Remote Management

7. Disable WPS

WPS

8. Use WPA2-AES or WPA3, strong Wi-Fi password

Wireless -> Wireless Security

9. Set Network Profile in Windows to Public

Under Network and Internet

10. Get your router’s public IP address and do a port scan from a VM outside your network

You can get your router’s public IP address from the router admin dashboard or from Powershell:

 (Invoke-WebRequest -UseBasicParsing "https://api.ipify.org").Content

Now do a port scan from a computer outside your network to see if there are any open (exposed) ports:

$ sudo nmap -Pn -sS -T3 --top-ports 1000 --reason $HOME_PUBLIC_IP

You want to see output like:

All 1000 scanned ports on c-xxx.hsd1.wa.comcast.net (xxx) are in ignored states.
Not shown: 1000 filtered tcp ports (no-response)

Bonus: scan UDP ports:

$ sudo nmap -Pn -sU -T3 --reason p 53,67,68,69,123,161,500,1900,5353,11211 $HOME_PUBLIC_IP

You want to see:

PORT      STATE         SERVICE  REASON
53/udp    open|filtered domain   no-response
67/udp    open|filtered dhcps    no-response
68/udp    open|filtered dhcpc    no-response
69/udp    open|filtered tftp     no-response
123/udp   open|filtered ntp      no-response
161/udp   open|filtered snmp     no-response
500/udp   open|filtered isakmp   no-response
1900/udp  open|filtered upnp     no-response
5353/udp  open|filtered zeroconf no-response
11211/udp open|filtered memcache no-response

Bonus Commands

Get your IPv6 address:

 ipconfig | findstr /i "IPv6"

If this only displays a Link-local IPv6 Address starting with fe80 you don’t have a IPv6 address.

List your network interfaces:

Get-NetAdapterBinding -ComponentID ms_tcpip6 | Format-Table Name,Enabled -AutoSize

Name                               Enabled
----                               -------
Wi-Fi                                 True
Bluetooth Network Connection          True
Ethernet                              True
Ethernet 2                            True
vEthernet (WSL (Hyper-V firewall))    True

Block Malware and Adult Content

Under DHCP settings (and WAN) change primary and secondary DNS to

Refer this. Run ipconfig /all (Windows) and verify:

Use this with caution as it can block legit websites:

>nslookup sidstick.com
Server:  family.cloudflare-dns.com
Address:  1.1.1.3

Non-authoritative answer:
Name:    sidstick.com
Addresses:  ::
          0.0.0.0

If I change to Google nameservers

nslookup sidstick.com 8.8.8.8
Server:  dns.google
Address:  8.8.8.8

Non-authoritative answer:
Name:    sidstick.com
Address:  35.215.78.203

Rebooting the device

Click the Reboot button under System Tools to reboot this device.

Some settings of this device will take effect only after rebooting, which include:

  • Change the LAN IP Address (system will reboot automatically).
  • Change the DHCP Settings.
  • Change the Web Management Port.
  • Upgrade the firmware of this device (system will reboot automatically).
  • Restore this device’s settings to the factory defaults (system will reboot automatically).
  • Update the configuration with the file (system will reboot automatically).
Posted in Computers | Leave a comment

What AI tool was used to create each of the websites below

and which one is your favorite?

Posted in Uncategorized | Leave a comment

Running Spring Boot application with springdoc-openapi behind NGINX

Suppose you want all requests prefixed with /api to be forwarded by NGINX to spring boot. There are 2 common options:

  1. Strip out the /api prefix before sending the request to spring boot (NGINX calls this an upstream server). This is done as follows:
location ~ ^/api(/|$) {
        rewrite ^/api(/|$)(.*)$ /$2 break; 

So when a request like GET /api/foo is made when it reaches spring boot, spring boot sees a request to GET /foo.

  1. The second option is not to rewrite the URL.

The problem with option 1 is that the Swagger UI will then make XHR requests without the /api prefix and those requests will fail resulting in a broken UI. So in my case the option that has worked better is option 2. If we opt-in for option 2, we now have to tell Spring boot that all controllers should be prefixed with a base path of /api. This is easily done using following setting in application.properties:

# application.properties
server.servlet.context-path=/api

Alternatively one could use:

openapi.honeyBadgerOpenAPIDefinition.base-path=/api
springdoc.swagger-ui.path=/api/swagger-ui.html
springdoc.api-docs.path=/api/v3/api-docs

The first line has to be replaced with corresponding value in the generated Controller java code. In my case I have:

@Generated(value = "org.openapitools.codegen.languages.SpringCodegen", date = "2025-03-21T20:08:34.471664377-07:00[America/Los_Angeles]", comments = "Generator version: 7.4.0")
@RequestMapping("${openapi.honeyBadgerOpenAPIDefinition.base-path:}")
public class QueryApiController implements QueryApi {

There is one more piece I had to do to make it work. I was terminating TLS at NGINX and this caused Swagger UI to generate XHR requests with a http prefix which then causes Mixed Content warning in the browser and breaks the UI. This is fixed by adding following NGINX directive:

proxy_set_header X-Forwarded-proto https;

and also following application.properties:

server.forward-headers-strategy=NATIVE
server.use-forward-headers=true

Alternatively this also works:

server.forward-headers-strategy=framework
server.use-forward-headers=true

I recommend adding following directives as well for best results to the NGINX conf:

proxy_set_header Upgrade $http_upgrade;
proxy_set_header Connection 'upgrade';  # the Upgrade header has no effect unless Connection 'upgrade' header is also present
proxy_set_header Host $host;
proxy_cache_bypass $http_upgrade;
proxy_set_header X-Forwarded-For $proxy_add_x_forwarded_for;

The complete NGINX conf becomes:

location ~ ^/api(/|$) {        
        proxy_pass http://127.0.0.1:xxxx;  # Forward requests to spring boot
        proxy_http_version 1.1;
        proxy_set_header Upgrade $http_upgrade;
        proxy_set_header Connection 'upgrade';  
        proxy_set_header Host $host;
        proxy_cache_bypass $http_upgrade;
        proxy_set_header X-Forwarded-For $proxy_add_x_forwarded_for;
        proxy_set_header X-Forwarded-proto https; 
    }
Posted in Computers, programming, Software | Tagged , | Leave a comment

Startup Dilemmas

After running my own startup for a few months there are a few recurring dilemmas I have realized for an aspiring entrepreneur:

  • Do you target consumers (B2C) or businesses (B2B)? Consumers don’t want to pay anything for software. If Facebook starts charging $1/month tomorrow for their service, all users will go away. Businesses want to buy from other established businesses and through connections. Either way you are up against a a wall. For consumer oriented software the most likely route to monetization will be through ads. Dan Martell has a powerful piece of advice – sell to rich people. You will face less drama and tantrums. Rob Walling suggests avoiding B2C at all costs [1]. Its interesting because in his first book that he wrote decades ago, he was actually advocating for B2C at that time. This is his other video that I find myself rewatching again and again.
  • Do you build something that already exists in the market or something completely new? If you build something that already exists in the market people will ask why should I buy from you. If you build something completely new, the product-market fit is untested. Once again, either way you are up against a a wall. The advice is to build something that already exists [1] but I prefer building something completely new as you can have the whole market to yourself and don’t worry about competition – this is the advice given in Zero to One. Btw, its not easy to build something completely new. Consider yourself lucky if you can come up with an idea for which a product does not already exist in the market. Its incredibly difficult to come up with genuinely new and original product ideas.
  • Do you bootstrap or raise funding? For me its bootstrap. Start Small and Stay Small.
  • Do you go horizontal or vertical?

As with any dilemma there is no right or wrong answer to above. that’s what makes it a dilemma.

Timeless Advice

  • Sell before you build — Dan Martell
  • Market comes first, marketing second, aesthetics third and functionality a distant fourth — Rob Walling
  • Sell to rich people
  • Most startups fail not because they build something that no one wants to buy, its because they are not able to sell.
  • Niche markets are absolutely critical for the solopreneur. These markets are big enough for you but small enough for big players that they are not interested in entering. As a solo developer you have no chance of competing with big players. The riches are in the niches.
  • Listen to everyone but make your own decisions. Every situation is unique.

Further Reading

Posted in Career, Computers | Leave a comment

Not able to play audio in Java

TL;DR: You will likely not be able to play any audio using Java on WSL2 and there is not much you can do about it.

On my WSL2 machine I was not able to play any audio using java.sound.sampled package. Java does not recognize any devices (mixers). The call to AudioSystem.getMixerInfo() returns an empty array. I debugged this and this is what I found.

Java Sound relies on ALSA for audio functionality. ALSA libraries are installed on Linux kernel by default so you don’t have to do anything extra to install them. see:

siddjain@beelink:~$ dpkg -l | grep alsa
ii  alsa-topology-conf              1.2.5.1-2                               all          ALSA topology configuration files
ii  alsa-ucm-conf                   1.2.6.3-1ubuntu1.12                     all          ALSA Use Case Manager configuration files
siddjain@beelink:~$ dpkg -l | grep libasound2
ii  libasound2:amd64                1.2.6.1-1ubuntu1                        amd64        shared library for ALSA applications
ii  libasound2-data                 1.2.6.1-1ubuntu1                        all          Configuration files and profiles for ALSA drivers

but there is a utility package (package containing non-essential but useful utilities) that you can install by running

$ sudo apt install alsa-utils

so I did that. Then run:

aplay -l

which is supposed to list audio devices but does not show anything on my machine. And that is why Java fails as well.

But why does aplay -l not list any devices? after all I can play sound using ffplay.

The answer lies in the fact that ffplay does not use ALSA. Instead it uses pulseaudio. What is pulseaudio? PulseAudio is a software mixer [1]:

>ALSA is the kernel level sound mixer, it manages your sound card directly. ALSA by itself can only handle one application at a time.

>PulseAudio is a software mixer, on top of the userland (like you’d run an app). When it runs, it uses Alsa – without dmix – and manages every kind of mixing, the devices, network devices, everything by itself.

Ok so what next? Next, I installed another set of utils (this time PulseAudio utils):

sudo apt install pulseaudio-utils

Then I ran:

$ pactl list sinks
Sink #1
        State: SUSPENDED
        Name: RDPSink
        Description: RDP Sink
        Driver: module-rdp-sink.c
        Sample Specification: s16le 2ch 44100Hz
        Channel Map: front-left,front-right
        Owner Module: 19
        Mute: no
        Volume: front-left: 65536 / 100% / 0.00 dB,   front-right: 65536 / 100% / 0.00 dB
                balance 0.00
        Base Volume: 65536 / 100% / 0.00 dB
        Monitor Source: RDPSink.monitor
        Latency: 0 usec, configured 0 usec
        Flags: DECIBEL_VOLUME LATENCY
        Properties:
                device.description = "RDP Sink"
                device.class = "abstract"
                device.icon_name = "audio-card"
        Formats:
                pcm

We can see it lists a device. However on close inspection we can see this is not a real soundcard. What is happening here is that the system is using an RDP (Remote Desktop Protocol) audio sink (RDPSink), which means that audio is being redirected through a remote desktop session instead of a local sound card. This explains why:

  • aplay -l returns “no soundcards found” (because there is no physical sound card available).
  • Java Sound (getMixerInfo()) returns an empty array (because it cannot find an ALSA-backed audio device).
  • ffplay still works (because it is using PulseAudio, which supports networked audio devices like RDP).

Ok so what next now? Can we tell Java Sound to use PulseAudio instead of ALSA [1]? Well, its pretty involved [2]:

>It is a known issue that the proprietary Oracle JDK and JRE builds do not support PulseAudio.

>The IcedTea project got a PulseAudio backend that is designed for use with OpenJDK. This work is licensed under the GPL and this prevents oracle to use the code in their closed source builds unless Oracle decide to opensource their entire JDK/JRE.

>You as an individual can take a build the IcedTea PulseAudio back-end found in IcedTea/OpenJDK builds and use them with the Oracle JDK/JRE but you are not allowed to distribute the combination since it would be a violation of the copyright license. The setup instructions is found in the following bugreport.


To conclude, when ListAudioDevices is run on Windows:

javac ListAudioDevices.java
java ListAudioDevices

it prints out following:

Available mixers:
Mixer: Port Speakers (Intel? Smart Sound Te
Target Line Info:
  Line: SPEAKER target port
Mixer: Port LG Ultra HD (Intel(R) Display A
Target Line Info:
  Line: Master Volume target port
Mixer: Port Microphone (Intel? Smart Sound
Source Line Info:
  Line: MICROPHONE source port
Target Line Info:
  Line: Master Volume target port
Mixer: Port Desktop Microphone (Microsoft?
Source Line Info:
  Line: MICROPHONE source port
Target Line Info:
  Line: Master Volume target port
Mixer: Primary Sound Driver
Source Line Info:
  Line: interface SourceDataLine supporting 8 audio formats, and buffers of at least 32 bytes
  Line: interface Clip supporting 8 audio formats, and buffers of at least 32 bytes
Mixer: Speakers (Intel? Smart Sound Technology (Intel? SST))
Source Line Info:
  Line: interface SourceDataLine supporting 8 audio formats, and buffers of at least 32 bytes
  Line: interface Clip supporting 8 audio formats, and buffers of at least 32 bytes
Mixer: LG Ultra HD (Intel(R) Display Audio)
Source Line Info:
  Line: interface SourceDataLine supporting 8 audio formats, and buffers of at least 32 bytes
  Line: interface Clip supporting 8 audio formats, and buffers of at least 32 bytes
Mixer: Primary Sound Capture Driver
Target Line Info:
  Line: interface TargetDataLine supporting 8 audio formats, and buffers of at least 32 bytes
Mixer: Desktop Microphone (Microsoft? LifeCam HD-3000)
Target Line Info:
  Line: interface TargetDataLine supporting 8 audio formats, and buffers of at least 32 bytes
Mixer: Microphone (Intel? Smart Sound Technology (Intel? SST))
Target Line Info:
  Line: interface TargetDataLine supporting 8 audio formats, and buffers of at least 32 bytes
Posted in Computers, programming, Software | Tagged | Leave a comment

GCP vs AWS

I will cut the chase by saying GCP is better. Here’s why I think so:

In terms of pricing and customer service I think both are similar (in fact GCP seems just a bit cheaper) so my review is based on technical feature comparison. I want to mention I am not endorsing GCP in this post. I’ve had quite a bit of issues with it – mainly with the customer support. So again by no means this post is an endorsement of GCP but I do think from technical POV its better than AWS and part of the reason for writing this post is to remind myself. In fact as I wrote this post I was surprised as I started enumerating everything and that is again part of the reason for writing the post to make a list of everything I can remember if i have to revisit this topic anytime in future.

  1. First, GCPs project management is much better than AWS. GCP allows you to create as many projects as you want under one account and you can seamlessly switch between projects without having to re-login with a different set of credentials. Each project is isolated from another. Compared to AWS this is a godsend and reason enough to prefer GCP over AWS. To my knowledge AWS does not let you create multiple projects within an account [1]. You can create multiple accounts (organizations) but each account has to be associated with a unique email id (why? because some engineer decided to put a unique key constraint on the email id column) and to switch between accounts you have to login with a different set of credentials. This means I have to open multiple browser windows and also keep track of multiple passwords. Very inconvenient. AWS in theory provides a way to switch between sessions in same window but in practice it does not work very well. Every now and then I keep on getting a message that my session has expired and I need to login again. In fact AWS account and organization management is so convoluted it will require you to have a PhD to grasp it. They have multiple identity types – IAM identity is different from IAM Identity Center. List goes on.
  2. AWS portal is quite buggy. See below e.g.:

This is only one of the many emails I have received from AWS when I have filed a case about something not working and they respond back saying its a bug and the team is working on fixing it. On another occassion I was stuck with bugs (note I used plural not singular) in their UI preventing me from publishing a product on AWS Marketplace. Google has better engineers and it shows in their products.

  1. One area where GCP shines is with their BigQuery product for big-data analytics processing which IMO is much better than AWS Redshift. Again this is not a surprise when you consider Google is a data company and has been processing massive amounts of data since its inception.
  2. Another example is of Cloud Run which allows scaling to zero. AWS has AppRunner but it does not scale to zero and is the most requested feature from the community [1].
  3. Another thing I will mention is GCP’s intuitive naming. Names like VM and disks are self-explanatory. Compare to EC2 instance and Elastic Block Storage. Its these small things that make a subtle difference.
  4. When creating a VM GCP is clearly showing the Zone and allowing me to change it. Try that in AWS. And the cost is clearly stated. Try that in AWS.
  1. Compare the URL I need to login to GCP with the URL i need to login to AWS:
    GCP: https://console.cloud.google.com/compute/instances?project=my-project
    AWS: https://my-acctId-tdme5b43.us-east-1.console.aws.amazon.com/
    Which of these is more user-friendly and easy to remember?
  2. AWS fargate and apprunner both don’t not support gpu:
    https://github.com/aws/containers-roadmap/issues/88
    https://github.com/aws/apprunner-roadmap/issues/148
    but Google Cloud Run supports it (https://cloud.google.com/run/docs/configuring/services/gpu) and it also supports websockets.
  3. One cool feature GCP provides is AppEngine for which there is no equivalent in AWS.

Issues with GCP:

  1. For the poor customers, they make it super difficult for you to create a ticket.
  2. Keep getting ZONE_RESOURCE_POOL_EXHAUSTED whenever I try to provision a VM.

These are what I remember for now. Will add more to this list as I remember more. Do you have a different opinion? Let me know in the comments.

Further Reading

See for yourself what a shit show AWS is

I wanted to provision a DL VM. So I checked this link: https://docs.aws.amazon.com/dlami/latest/devguide/aws-deep-learning-ami-gpu-tensorflow-2.18-ubuntu-22-04.html

when i run

aws ssm get-parameter --region us-east-2 \
    --name /aws/service/deeplearning/ami/x86_64/oss-nvidia-driver-gpu-tensorflow-2.18-ubuntu-22.04/latest/ami-id \
    --query "Parameter.Value" \
    --output text

I get

ami-00cdd016bd7f2b052

and behold what do we get when we try to get the image details:

$ REGION=us-east-2 AMI_ID=ami-00cdd016bd7f2b052 aws ec2 descr
ibe-images   --region $REGION   --image-ids $AMI_ID   --query 'Images[0].{ID:ImageId,Name:Name,Owner:OwnerId,State:S
tate,Arch:Architecture,RootDevice:RootDeviceType,Platform:PlatformDetails,CreationDate:CreationDate,Desc:Description
}'   --output table
--------------------------------------------------------------------
|                          DescribeImages                          |
+--------------+---------------------------------------------------+
|  Arch        |  arm64                                            |
|  CreationDate|  2025-02-22T06:10:04.000Z                         |
|  Desc        |  EKS Auto Node AMI (variant: nvidia, k8s: 1.32)   |
|  ID          |  ami-00003580840480f10                            |
|  Name        |  eks-auto-nvidia-1.32-aarch64-20250222            |
|  Owner       |  975050179949                                     |
|  Platform    |  Linux/UNIX                                       |
|  RootDevice  |  ebs                                              |
|  State       |  available                                        |
+--------------+---------------------------------------------------+

It has changed to arm64 and the AMI ID has also changed.

$ REGION=us-east-2 AMI_ID=ami-00cdd016bd7f2b052 aws ec2 descr
ibe-images   --region us-east-2   --image-ids $AMI_ID  --owners 898082745236 --query 'Images[0].{ID:ImageId,Name:Nam
e,Owner:OwnerId,State:State,Arch:Architecture,RootDevice:RootDeviceType,Platform:PlatformDetails,CreationDate:Creati
onDate,Desc:Description}'   --output table
---------------------------------------------------------------------------------------------------------------------------------------------------------------------------
|                                                                             DescribeImages                                                                              |
+--------------+----------------------------------------------------------------------------------------------------------------------------------------------------------+
|  Arch        |  x86_64                                                                                                                                                  |
|  CreationDate|  2024-11-06T11:47:41.000Z                                                                                                                                |
|  Desc        |  Supported EC2 instances: G4dn, G5, G6, Gr6, P4d, P5. Release notes: https://docs.aws.amazon.com/dlami/latest/devguide/appendix-ami-release-notes.html   |
|  ID          |  ami-03de840ff9fff792d                                                                                                                                   |
|  Name        |  Deep Learning OSS Nvidia Driver AMI GPU TensorFlow 2.15 (Ubuntu 20.04) 20241101                                                                         |
|  Owner       |  898082745236                                                                                                                                            |
|  Platform    |  Linux/UNIX                                                                                                                                              |
|  RootDevice  |  ebs                                                                                                                                                     |
|  State       |  available                                                                                                                                               |
+--------------+----------------------------------------------------------------------------------------------------------------------------------------------------------+
Posted in Computers, programming, Software | 2 Comments

Windows Security Tips

Probably the most important tool is Windows Defender. Press Win+R followed by wf.msc

and check all the inbound rules. Delete ones you don’t recognize – it can be difficult. Useful powershell commands:

Get-NetTCPConnection -State Listen

this is equivalent of ss -tpln on Linux. To get your public IP address:

curl -s https://api64.ipify.org

Other Useful Windows Programs

  • WinDirStat – see what files are taking up space

List Inbound rules

Get-NetFirewallRule -Enabled True -Direction Inbound -Action Allow |
  ForEach-Object {
    $r = $_
    $port = $r | Get-NetFirewallPortFilter
    $app  = $r | Get-NetFirewallApplicationFilter
    $addr = $r | Get-NetFirewallAddressFilter

    [PSCustomObject]@{
      Name      = $r.DisplayName
      Profile   = "$($r.Profile)"
      Program   = $app.Program
      Protocol  = $port.Protocol
      LocalPort = $port.LocalPort
      Remote    = $addr.RemoteAddress
    }
  } |
  Where-Object { $_.Profile -match "Public|Any" } |
  Sort-Object Protocol, LocalPort, Name |
  Format-Table -AutoSize

List open ports

Get-NetTCPConnection -State Listen |  Sort-Object LocalPort |  Select-Object LocalAddress,LocalPort,OwningProcess

Get Process Details

Get-Process -Id 10628,1428,7716,4608,4536,28912,1124,536,2588,3112,4200,4592,1072 | 
  Select-Object Id,ProcessName,Path | Format-Table -AutoSize

Uninstall Recall if you still have it

You want to see this output:

dism /online /get-featureinfo /featurename:recall

Deployment Image Servicing and Management tool
Version: 10.0.26100.5074

Image Version: 10.0.26200.8037

Feature Information:

Feature Name : Recall
Display Name : Recall
Description : Recall application.
Restart Required : Possible
State : Disabled with Payload Removed

Custom Properties:

(No custom properties found)

The operation completed successfully.

Unlink your device before giving it to someone else

Goto https://account.microsoft.com/devices/ and make sure to unlink / remove your device before giving it to someone else

Uninstall OneDrive Desktop App if you want

I like OneDrive but if you are worried about accidental deletion of files on OneDrive caused due to deletion of files on your local PC, you can uninstall the OneDrive Desktop App.

Any deleted files on OneDrive are available in the Recycle Bin for 30 days. That rescues and remediates most accidental deletions.

Posted in Computers, programming, Software, Uncategorized | Leave a comment

10 Svelte Tips for a Backend Engineer

Svelte is currently my framework of choice for frontend web development.

  1. You can bundle your backend (server side code) and frontend into one SvelteKit application but I don’t recommend it. Any non-trivial application will have a sizable backend API and it will only grow over time. Resist the urge and split the backend API into separate ExpressJS app. This way you can hand off backend development to a separate engineer, test the backend independently and if you are outsourcing frontend development, you don’t have to share your backend code. Another benefit is that when you develop mobile clients they can share the same backend. Also this way you can get rid of those pesky cross-origin requests are not allowed errors. That’s half-a-dozen advantages (did you count?) if not more.
  2. If you are developing internal applications and don’t care about SEO you can create a SPA and serve it via NGINX or Apache. Just set export let ssr = false in src/routes/layout.js.
  3. How do you decide whether a dependency goes under dependencies or devDependency? Use following flowchart: is the dependency used by client-side code or server-side code? If client-side (i.e., browser), it goes under devDependencies. If server-side it goes under dependencies. If you paid attention to tip #1 and all server-side code is in a separate project, all your dependencies can go under devDependencies. Btw, the whole issue becomes a moot point (not applicable) if you will be building the app on the server prior to deployment. Let me explain: when it comes to deployment you have two choices: Option1: the code is built on the same machine on which it is deployed. Option 2: the code is built on a separate machine and the build artifacts are deployed on the deployment machine (i.e., there are separate machines in charge of building the code (CI/CD) and running the code). The dependency vs devDependencies distinction is meaningful only for Option 2. If you are using Option 1, you still need to install all the devDependencies to build your code.
  4. SvelteKit docs don’t mention it but the whole section they have on error handling is w.r.t. handling a request to the server and the built-in error handling only kicks into effect if the error happens inside the load function or +server.js. When your application is running in the browser and an error happens, SvelteKit won’t catch it. The browser javascript code is not running on top of any framework. Its the server-side code that runs on top of a framework so the framework is able to catch an exception. This was the biggest gotcha for me and I spent a lot of time debugging why my client-side errors were not being handled (since the docs don’t provide the clarification)
  5. The other issue which caused me lot of pain is the dreadful Cross-site POST form submissions are forbidden. If you are using Tip #1 then we side-step the issue entirely. Another benefit of not putting any server-side logic in your Svelte application.
  6. Remember process.env does not exist in the browser (this shouldn’t need to be mentioned but I am a backend developer). Use this for env variables on the client-side.
  7. There are some important differences between npm run dev and running the application using node build. Of course in the former case you will get hot loading (you don’t have to re-run the app if you make changes to a file) and that’s what we mostly think about but also keep in mind that files like vite.config.ts have no effect when the application is run using node build. You are not using vite in that case so vite configuration does not matter.
  8. Understand the role of SvelteKit adapters and the difference between Svelte and SvelteKit. The adapters determine how your application is built (i.e., what happens when you run npm run build) and deployed for a specific platform. Static Site Generation = adapter-static. Static Site Generation != ssr = false. Use Static Site Generation when there is no server-side logic in your codebase – its a pure client-side (browser) application that can be served statically over NGINX for example.
  9. I shouldn’t have to say this but make sure to test how the app behaves when there is an error calling the backend. This is my pet-peeve. Often time engineers only test the happy path and there is nothing more embarrassing than an error in the error handling code. This is one thing that differentiates a junior engineer from a senior one. Use a mock backend to test out the UI code thoroughly and decouple UI developer from backend developer – both can develop independently and UI developer need not be blocked on backend developer.
  10. For the UI I currently use SMUI and am satisfied with it. I am generally a fan of the look and feel of Google products and the SMUI library has concise documentation with examples. Many other libraries have so much documentation that it becomes difficult to get started and you have to learn a lot of concepts and background just to become productive. You don’t necessarily have to use a UI library. I use it because standard HTML does not provide some UI elements that are present in SMUI (for example standard HTML has no menu). But if you are using a UI library then be consistent and don’t mix and match. What Svelte UI library is your favorite and what is your top tip for Svelte development? Drop me a comment below

Further Reading

Posted in Computers, programming, Software | Leave a comment

letsencrypt/certbot tips

Letsencrypt uses certbot for certificate management. If your certificate is not auto renewing follow the runbook below:

  1. Check if certbot is scheduled to auto-renew. Do this by running:
$ systemctl list-timers | grep certbot
Thu 2025-01-30 10:56:00 UTC 17h left Wed 2025-01-29 12:32:03 UTC 4h 27min ago snap.certbot.renew.timer snap.certbot.renew.service

we see that certbot is scheduled to auto-renew

  1. Check past renewal attempts
$ sudo journalctl -u snap.certbot.renew.service --no-pager --since "2 days ago"

I see there are failures when certbot attempted to renew the certificate in the past:

Jan 28 10:56:03 systemd[1]: Starting snap.certbot.renew.service - Service for snap application certbot.renew...
Jan 28 10:59:01 certbot.renew[2467823]: Failed to renew certificate mysite.com with error: Could not bind TCP port 80 because it is already in use by another process on this system (such as a web server). Please stop the program in question and then try again.
Jan 28 10:59:01 certbot.renew[2467823]: All renewals failed. The following certificates could not be renewed:
Jan 28 10:59:01 certbot.renew[2467823]: /etc/letsencrypt/live/mysite.com/fullchain.pem (failure)
Jan 28 10:59:01 certbot.renew[2467823]: 1 renew failure(s), 0 parse failure(s)
Jan 28 10:59:01 systemd[1]: snap.certbot.renew.service: Main process exited, code=exited, status=1/FAILURE
Jan 28 10:59:01 systemd[1]: snap.certbot.renew.service: Failed with result 'exit-code'.
Jan 28 10:59:01 systemd[1]: Failed to start snap.certbot.renew.service - Service for snap application certbot.renew.
  1. This failure Could not bind TCP port 80 because it is already in use by another process is because nginx is running on port 80. Open /etc/letsencrypt/renewal/essofore.com.conf
# Options used in the renewal process
[renewalparams]
authenticator = standalone

authenticator = standalone is the problem. Change it to authenticator = nginx.

  1. Other useful commands. To do a dry run, run:
 sudo certbot renew --dry-run

You should see output similar to following:

Saving debug log to /var/log/letsencrypt/letsencrypt.log
- - - - - - - - - - - - - - - - - - - - - - - - - - - - - - - - - - - - - - - -
Processing /etc/letsencrypt/renewal/mysite.com.conf
- - - - - - - - - - - - - - - - - - - - - - - - - - - - - - - - - - - - - - - -
Simulating renewal of an existing certificate for mysite.com and www.mysite.com
- - - - - - - - - - - - - - - - - - - - - - - - - - - - - - - - - - - - - - - -
Congratulations, all simulated renewals succeeded:
/etc/letsencrypt/live/mysite.com/fullchain.pem (success)
- - - - - - - - - - - - - - - - - - - - - - - - - - - - - - - - - - - - - - - -

5. check

$ sudo openssl x509 -in /etc/letsencrypt/live/essofore.com/fullchain.pem -text -noout

By default, the snap version of Certbot runs twice per day. The way to verify this is by running:

systemctl list-timers | grep certbot

this should give output like following:

Wed 2025-08-20 23:29:00 UTC 2h 58min Wed 2025-08-20 06:25:23 UTC 14h ago snap.certbot.renew.timer snap.certbot.renew.service

What this means:

  • last run happened 14h ago on Wed 2025-08-20 06:25:23 UTC
  • next run will happen at Wed 2025-08-20 23:29:00 UTC in 2h 58min

snap.certbot.renew.timer is the systemd unit that is responsible for running the certbot service. The service checks for renewal and then exits. To inspect the timer:

$ systemctl cat snap.certbot.renew.timer
# /etc/systemd/system/snap.certbot.renew.timer
[Unit]
# Auto-generated, DO NOT EDIT
Description=Timer renew for snap application certbot.renew
Requires=snap-certbot-4890.mount
After=snap-certbot-4890.mount
X-Snappy=yes
[Timer]
Unit=snap.certbot.renew.service
OnCalendar=*-*-* 06:25
OnCalendar=*-*-* 23:29
[Install]
WantedBy=timers.target

if you inspect the service itself you may see something like

$ systemctl status snap.certbot.renew.service
○ snap.certbot.renew.service - Service for snap application certbot.renew
Loaded: loaded (/etc/systemd/system/snap.certbot.renew.service; static)
Active: inactive (dead) since Wed 2025-08-20 06:25:24 UTC; 14h ago
TriggeredBy: ● snap.certbot.renew.timer
Process: 79847 ExecStart=/usr/bin/snap run --timer=00:00~24:00/2 certbot.renew (code=exited, status=0/SUCCESS)
Main PID: 79847 (code=exited, status=0/SUCCESS)
CPU: 694ms
Aug 20 06:25:23 ip-172-31-63-44 systemd[1]: Starting snap.certbot.renew.service - Service for snap application certbot.renew...
Aug 20 06:25:24 ip-172-31-63-44 systemd[1]: snap.certbot.renew.service: Deactivated successfully.
Aug 20 06:25:24 ip-172-31-63-44 systemd[1]: Finished snap.certbot.renew.service - Service for snap application certbot.renew.

The inactive (dead) is not a cause for concern and is expected because the service checks for renewal and then exits. we can verify service exited normally code=exited, status=0/SUCCESS.

To run certbot for specific domains

sudo certbot -v --nginx --domains domain1,domain2,domain3

If there is no nginx configuration for the listed domains I have seen it fail with:

Could not automatically find a matching server block for xxx. Set the `server_name` directive to use the Nginx installer

It does save the certificate and also set up the auto-renewal task. Its just not possible to create a NGINX configuration for the listed domains because it cannot find any configuration for listed domains. All that is left is to write the nginx config yourself. You can find the cert and key under:

Certificate is saved at: /etc/letsencrypt/live/xxx/fullchain.pem
Key is saved at: /etc/letsencrypt/live/xxx/privkey.pem

How can I check if my certificate is indeed set to auto-renew?

Great question 👍 — you want to see exactly which domains are tied to each certificate and will be attempted at renewal. Certbot keeps that metadata in renewal configuration files.


1. List all certificates Certbot knows about

sudo certbot certificates

This prints something like:

Found the following certs:
  Certificate Name: xxxx
    Domains: xxxx
    Expiry Date: 2025-11-18 11:42:01+00:00 (VALID: 89 days)
    Certificate Path: /etc/letsencrypt/live/xxx/fullchain.pem
    Private Key Path: /etc/letsencrypt/live/xxx/privkey.pem

  • Certificate Name = internal name Certbot uses (often the first domain you requested).
  • Domains = all hostnames covered by that cert.
  • These are exactly what Certbot will check when it runs renew.

2. Inspect the renewal config file directly

Each certificate has a file under /etc/letsencrypt/renewal/:

ls /etc/letsencrypt/renewal/

You’ll see files like xxx.conf.
Open one:

sudo cat /etc/letsencrypt/renewal/xxx.conf

Inside you’ll find:

cert = /etc/letsencrypt/live/xxx/cert.pem
privkey = /etc/letsencrypt/live/xxx/privkey.pem
chain = /etc/letsencrypt/live/xxx/chain.pem
fullchain = /etc/letsencrypt/live/xxx/fullchain.pem

[renewalparams]

authenticator = nginx installer = nginx account = abcdef123456 server = https://acme-v02.api.letsencrypt.org/directory

The [renewalparams] section controls how renewal will run.
The list of domains comes from the symlink in /etc/letsencrypt/live/..., which is always up-to-date.


3. Test renewal for a specific cert

If you want to be absolutely sure which domains it’s going to try:

sudo certbot renew --cert-name xxx --dry-run -v

This will print the exact domains it attempts.


Summary:

  • Run sudo certbot certificates → shows all domains covered per cert.
  • Look in /etc/letsencrypt/renewal/*.conf for config.
  • Use certbot renew --cert-name … --dry-run to test renewal end-to-end.

Deleting a certificate

If you move your website to another server you will want to update certbot to forget about the domain and stop renewing certificate for it. To do that first run

sudo certbot certificates

to see what certificates are being managed by certbot and just delete the certificate of the website that you are no longer hosting on the server. Do that by running:

 sudo certbot delete --cert-name  <cert-name>

Update domains associated with a certificate

We basically tell certbot to issue a new certificate for the domains we want.

sudo certbot certonly --nginx --cert-name xxx -d domains

The key is to use the --cert-name option which will override the existing certificate.

- - - - - - - - - - - - - - - - - - - - - - - - - - - - - - - - - - - - - - - -
You are updating certificate xxx to include new domain(s):
(None)
You are also removing previously included domain(s):
(None)
Did you intend to make this change?
- - - - - - - - - - - - - - - - - - - - - - - - - - - - - - - - - - - - - - - -
(U)pdate certificate/(C)ancel: U

If you don’t use the --cert-name option with same certificate name, a new certificate will get issued and the old one will stay as-is.

Posted in Computers, programming, Software | Tagged , , , , | Leave a comment