
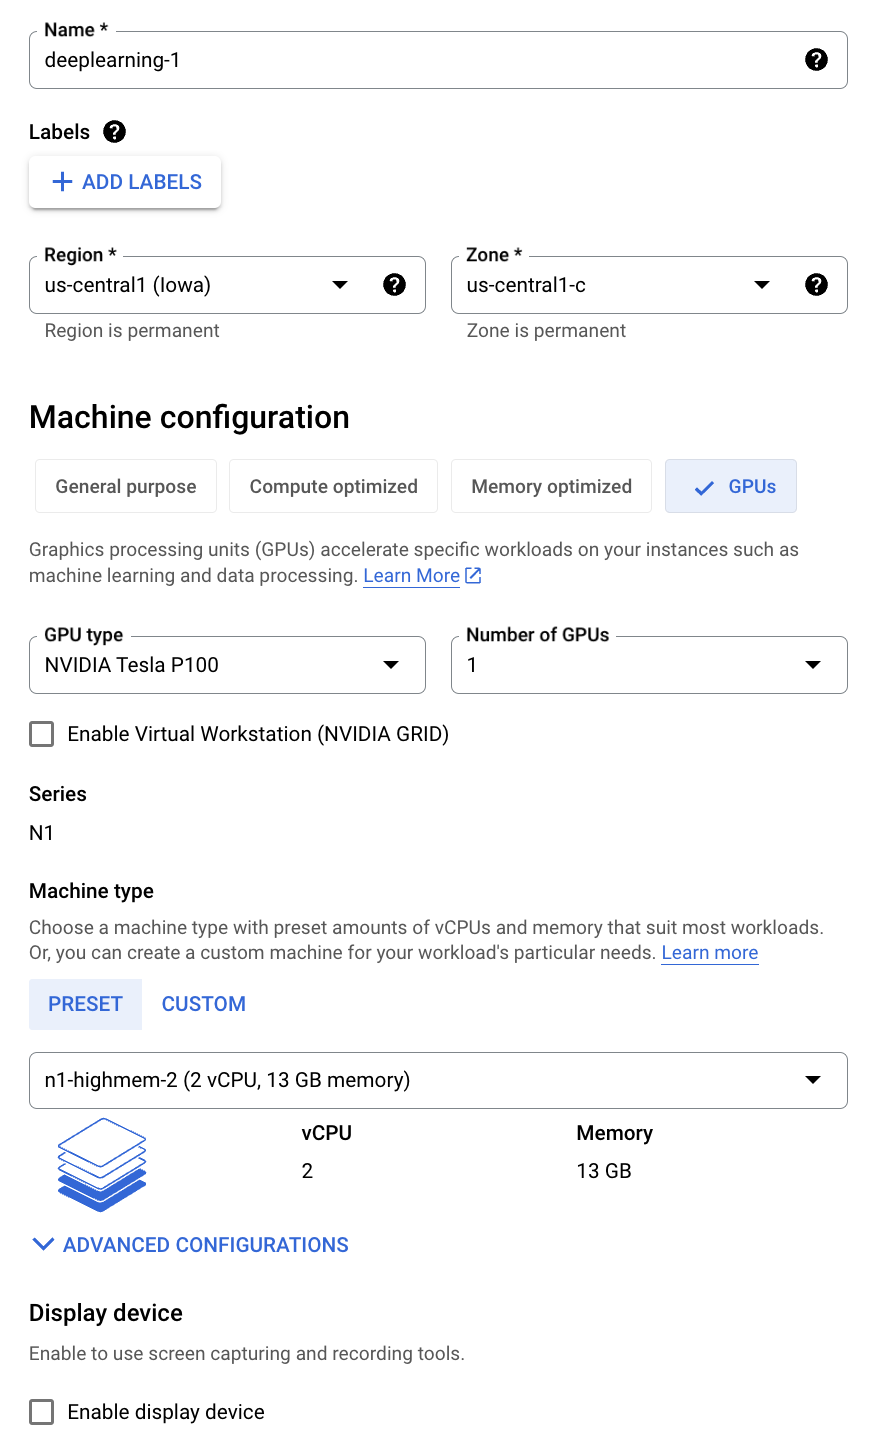
Making notes of this so I will remember later on. You can install a deep learning VM from the marketplace but I did not do that. I did it the hard way. I started with this:
Choosing the wrong Boot disk image
This section is for posterity. Do yourself a favor. Skip it and move on to next section.
Under the boot disk I selected following Deep Learning image (as suggested by Google) so I would get the NVIDIA drivers pre-installed :

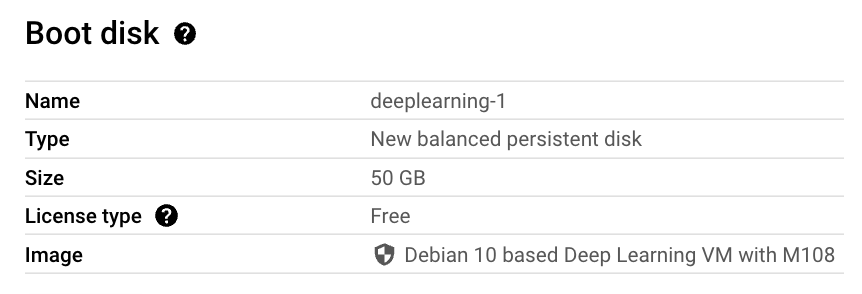
and that was my mistake. This image uses old version of Debian. The bigger problem is that it comes with version 2.28 of libc which gave me this issue later on when I tried to run privateGPT. I was never able to recover from the issue. In my attempts to fix it, I compiled version 2.29 of libc. But you can’t just replace an older version of libc with a newer version so that you can make one program work. What about all the other programs who might be relying on the other version. In fact, I got bit hard, very hard. I thought let me move (rename) the older version, try if newer version works and if it doesn’t I’ll revert back to older version. So I typed following command in the /lib/x86_64-linux-gnu directory:
$ sudo mv libc.so.6 libc-2.28.so.6
libc.so.6 is actually a symlink to libc-2.28.so. Anyway, this is one command you never want to type. All hell broke loose after that. All shell commands stopped working. Reason? When you run any (well not any but pretty much almost all of them) shell command, it loads the libc.so C library (libc is the standard C library). Now after this rename, the programs cannot find this library and so they stop working. You can’t rename (mv) the file back again, because mv no longer works! See this SO post. There is an environment variable LD_PRELOAD using which you can explicitly specify which libraries should be pre-loaded before running a command. So you think one could do:
LD_PRELOAD=./libc-2.28.so.6 mv libc-2.28.so.6 libc.so.6
but it doesn’t work because you need sudo privileges to write to the privileged /lib/x86_64-linux-gnu directory. Ok, so can’t we do:
LD_PRELOAD=./libc-2.28.so.6 sudo mv libc-2.28.so.6 libc.so.6
No, and for good reason. Well configured systems disallow (or ignore) and environment variables such as LD_PRELOAD flag when sudo is run. Not doing this would open up a security vulnerability. Google ld_preload sudo exploit. e.g. see this article.
The TL;DR was that I was SOL. I spent an entire day but could never come out of the hole. I had already spend better half of the day installing and setting up various tools before I ran into the libc error. all the work was wasted.
Choosing the right boot disk image
Next day I repeated the steps and this time I selected a Debian 11 image albeit without any graphics drivers pre-installed on it:

This one comes with:
$ ls -al /lib/x86_64-linux-gnu/libc.so.6
lrwxrwxrwx 1 root root 12 Apr 19 21:17 /lib/x86_64-linux-gnu/libc.so.6 -> libc-2.31.so
Add additional disk
For the boot disk I only chose 50 GB. I added another 400 GB disk to store the data and the application. You have to follow a lot of steps to be able to use the disk. The disk has to be formatted, then mounted and then /etc/fstab has to be edited so the mount persists when the VM reboots. Fortunately Google has documented them nicely over here. Make sure you follow them as they have specified starting from here.
Tip: Make sure you set following environment variables in ~/.profile in order to use this additional disk for storing NLP models and datasets:
export TRANSFORMERS_CACHE=/app/.cache
export HF_DATASETS_CACHE=/app/.cache
In above I have mounted the additional disk to /app folder on the VM. If you don’t do this step transformers and huggingface will store models and datasets under ~/.cache and you will quickly run out of disk space on the OS disk.
Securing the VM
You should secure the VM to your liking:
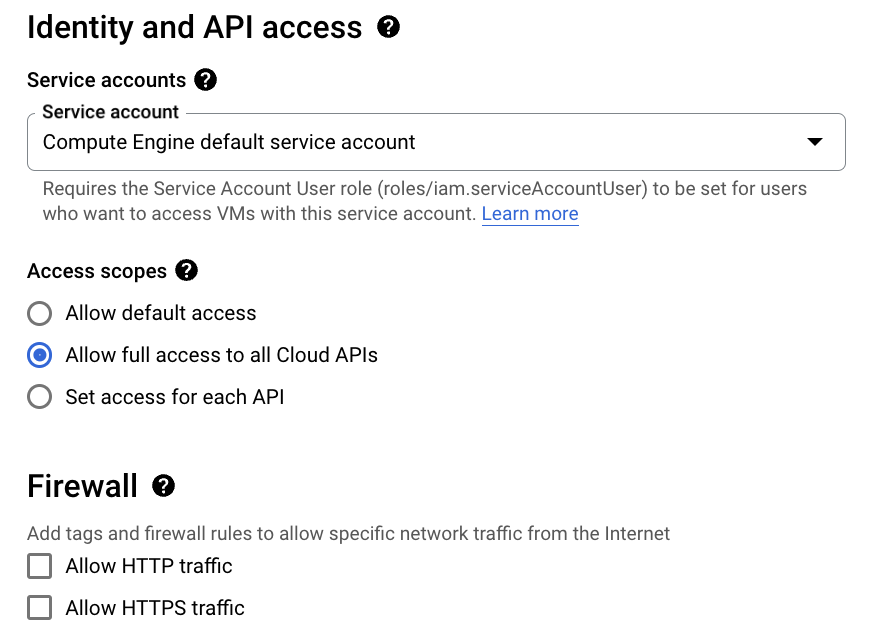
In above I am allowing programs running on the VM to connect to all GCP services like Google Cloud Storage etc. and disabling anyone from connecting to this VM over HTTP(S). These settings can be changed later on if you desire from the web console.
VPC Networking
You may even put the VM under a VPC Network and remove assigning a public IP to the VM. The setting for this is under Advanced Options -> Networking -> Network interfaces. You should have a VPC Network (and a subnet) already setup previously before you can put the VM in the private network. If you are in a corp environment, you almost invariably want to do this.
By default a VPC Network is not configured to allow VMs in it to connect to the internet. To fix this one has to set up a Cloud NAT Gateway and add the subnets to the NAT Gateway. This requires careful configuration. Keep notes of what you are doing, so you can revert if you break something.
That’s it for this post. In next post we’ll cover installing graphics device drivers and other development tools and libraries such as Python.
