
I keep forgetting it so it deserves a post of its own. To access the Ubuntu directory from Windows Explorer type:
\\wsl$
Also run:
mklink /d c:\wsl2-home \\wsl$\Ubuntu\home\me
to create a directory on c:\ from where you can access the WSL filesystem refer this.
How to know if you are running WSL1 or WSL2
$ uname -r
5.10.16.3-microsoft-standard-WSL2
How to access C drive from WSL?
/mnt/c
How WSL works
The way I understand it is that WSL2 runs a build of Linux on a lightweight VM in Windows and that’s the way it works. So the takeaway here is that it is really running Linux not any translation or proxy layer.
Keyboard Shortcuts
Scroll Up/Down: Ctrl+Shift+Page Up/Down
Windows Terminal
Windows terminal is separate from the cmd.exe utility that comes with Windows. When you open WSL command prompt using the windows terminal, it actually executes following under the covers:
C:\WINDOWS\system32\wsl.exe -d Ubuntu
Enabling systemd on WSL2
$ cat /etc/wsl.conf
[boot]
systemd=true
Increase memory available to WSL2
cat %UserProfile%/.wslconfig
[wsl2]
memory=16GB
Limit the size to which WSL2 can grow
# Can be used to limit the maximum size that a distribution file system is allowed to take up.
# https://chatgpt.com/c/69aa1f04-18a0-83e8-ba0f-01d0ea45eacf
defaultVhdSize=230GB
remember to shutdown and restart WSL2 after that
wsl --shutdown
verify there are no running instances
wsl --list --running
Danger Zone!
Once I had to reset my PC as I was getting a blue screen and Windows wasn’t booting up. Even though I selected to Keep my Files option, all the data of WSL2 was deleted. So do beware of this.
All WSL2 data is stored in this file c:\users\siddj\AppData\Local\Packages\CanonicalGroupLi...\LocalState\ext4.vhdx
 Get-Item "$env:LOCALAPPDATA\Packages\CanonicalGroupLimited.Ubuntu_*\\LocalState\\ext4.vhdx" | Select Name,Length

Name            Length
----            ------
ext4.vhdx 177508188160

Other Notes
Over time I have begun to like WSL because it avoids all the surprising gotchas that happen when you develop on Mac but deploy on Linux esp. when doing C++ development. E.g., installing NGINX is easy on WSL. Contrast this to Mac. NGINX does not have official installer on Mac and the Homebrew software has caused me more pain than pleasure.
Many software just don’t work on Mac. Some examples: 1, 2
Another bonus is that with WSL I was able to test a program I would deploy with systemd. With Mac you can’t do that as there is no systemd.
Yet another bonus (not related to WSL specifically but an issue with Mac) is that w/ Mac I was once recording a screen and to my surprise there is no way to pause the recording (just search on google and let me know if you find an answer)! With Windows I can do that. I can pause and resume using the screen recorder that comes with the snipping tool.
One tip when using WSL is that if you run any program from Windows (/mnt/c) it will run slowly. The fix is to treat WSL as a separate machine and install separate copy of software on WSL. E.g., see this.
Over time I have now completely switched over to WSL2 from Mac and liking it so far. What do you prefer?
Monitoring Network Activity
Try installing mitmproxy and run [1]:
mitmproxy --mode local
also see this for quick and dirty and this. wireshark is the other tool.
The catch with mitmproxy is for it to intercept requests, all traffic has to be routed through it. It seems there is no good way to do this. A hack is to set following environment variables:
# In ~/.bashrc or ~/.zshrc:export http_proxy=http://<windows-ip>:8080export https_proxy=http://<windows-ip>:8080export no_proxy=localhost,127.0.0.1
Its a hack because this is not a standard but many programs respect these env variables [1].
Using `ss -tpln you can get list of processes with open sockets. To get the name of actual process run (1520952 is the PID in below):
$ ps -fp 1520952UID PID PPID C STIME TTY TIME CMDsiddjain 1520952 1518245 33 13:16 pts/2 00:00:32 /home/siddjain/.vscode-server/bin/6f17636121051a53c88d3e605c491d
Yep — that PID is a VS Code Server child.
Your ps shows the binary under the remote VS Code install:
/home/siddjain/.vscode-server/bin/6f17636121051a53c88d3e605c491d...
So the Node process listening on *:3761 was spawned by VS Code Server (likely an extension host, debug adapter, or a tool the extension started), not your own app.
Here’s how to see exactly what it is and why it’s on 3761:
- Get the full command line & executable
ps -o pid,ppid,user,lstart,cmd -p 1520952
readlink -f /proc/1520952/exe
tr '\0' ' ' < /proc/1520952/cmdline; echo
- See which socket it opened and from where
lsof -Pan -p 1520952 -iTCP -sTCP:LISTEN
ls -l /proc/1520952/cwd
- Walk the parent chain to confirm VS Code Server
ps -o pid,ppid,cmd -p 1520952
ps -o pid,ppid,cmd -p 1518245     # parent shown in your ps
pstree -sap 1520952               # if pstree is installed
- Quick “who’s on this port?” one-liner
lsof -iTCP:3761 -sTCP:LISTEN -n -P
If it turns out to be an extension:
- Disable it temporarily in VS Code and reconnect (Command Palette → “Extensions: Show Running Extensions” and “Developer: Show Running Extensions”).
- Or kill the server session: Command Palette → “Remote: Kill VS Code Server on Host”.
- Worst case, nuke that specific server build and let it reinstall:
rm -rf ~/.vscode-server/bin/6f17636121051a53c88d3e605c491d*
Copy contents of a file to the clipboard in WSL
cat file.txt | clip.exe
Protect against out of disk space
if you are running Docker (I hate it!) it can quickly cause you to run out of disk space and cause a catastrophic failure where WSL2 or even Windows cannot start. To protect yourself against this happening create a 1GB file that you can delete when you run out of disk space – its like keeping 1GB in reserve that no one can touch. Here are the steps courtesy of ChatGPT:
Great question. That “airbag” file is a tiny trick that can save you when a filesystem gets 100% full and basic tools start failing.
What it is
# create a 1 GiB reserve file in your home (same FS that fills up)
fallocate -l 1G ~/.space_rescue || dd if=/dev/zero of=~/.space_rescue bs=1M count=1024
fallocate -l 1G …: asks the filesystem to pre-allocate 1 GiB of real disk blocks for that file (fast, no zeroing).|| dd …: fallback iffallocateisn’t supported;ddactually writes zeros to fill 1 GiB (slower, but universal).
Either way, you end up with a normal file that really consumes space now.
How it helps
When the disk later hits 100%:
- You can instantly free space by deleting or truncating this one file—no need to hunt for big folders or run
rm -rfon trees:# fastest: just unlink it rm -f ~/.space_rescue # or keep the file but free its blocks : > ~/.space_rescue # truncates to 0 bytes - That immediately gives you ~1 GiB of breathing room so that:
- logs/services can write again,
- package managers and shells stop crashing,
- you can run
du,ncdu,apt-get clean, etc., to do a proper cleanup.
Important details
- Put it on the same filesystem that fills up. Verify with:
df -h ~ ~/.space_rescueIn WSL2, that means inside your Ubuntu ext4 (not under/mnt/c). - Name & location: your home (
~/.space_rescue) is fine; don’t put it in/varwhere cleaners might delete it automatically. - Size: 1–2 GiB is plenty. Create larger if your workloads spike hard:
fallocate -l 2G ~/.space_rescue - Recreate it after cleanup so you’re protected next time.
- Doesn’t help Windows C: directly. It only frees space inside the WSL filesystem. To reflect the savings in Explorer, you still do:
sudo fstrim -av(inside WSL),wsl --shutdown(Windows),- compact the VHDX (DiskPart/Hyper-V as we discussed).
Extras & cautions
- On copy-on-write or quota’d filesystems behavior can differ, but on WSL’s ext4 it works as expected.
- If you accidentally place it on a different mount (
/mnt/c), it won’t help when Ubuntu’s root (/) is full.
TL;DR: it’s a pre-reserved chunk of disk you can delete in one command to instantly recover from a “disk full, everything breaking” situation.
SOS: Compacting WSL2 VHDX when you run out of disk space
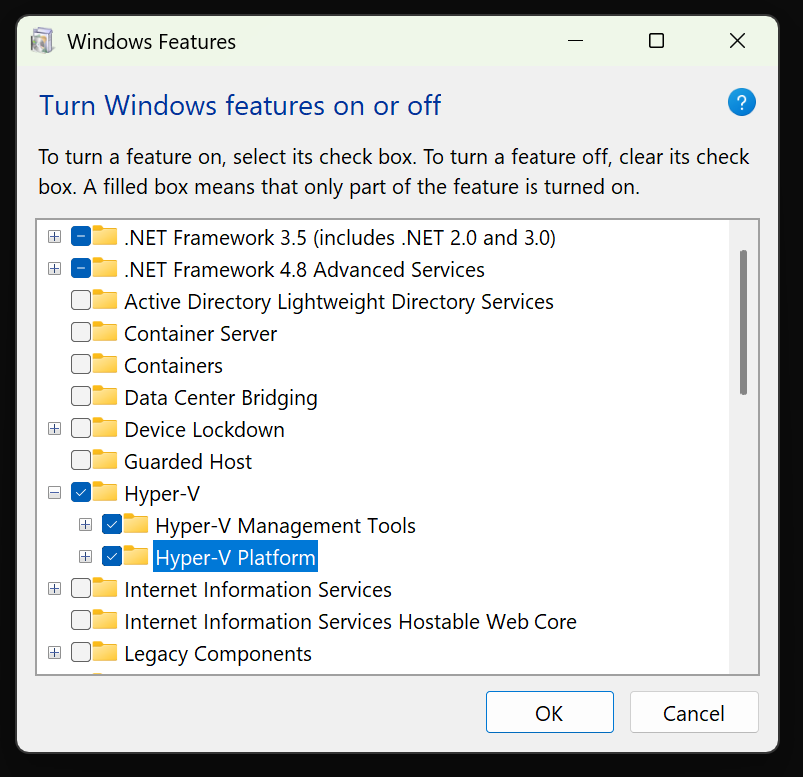
Prerequisites: HyperV Platform and HyperV Management Tools must be installed
- Free up space inside WSL
rm -f ~/.space_rescue/*  # or whatever path you used
sync
Step 2: Inside WSL2
sudo fstrim -av
this tells WSL’s ext4 to discard freed blocks (important)
- Shutdown WSL (releases the VHDX lock)
From Windows (PowerShell):
wsl --shutdown
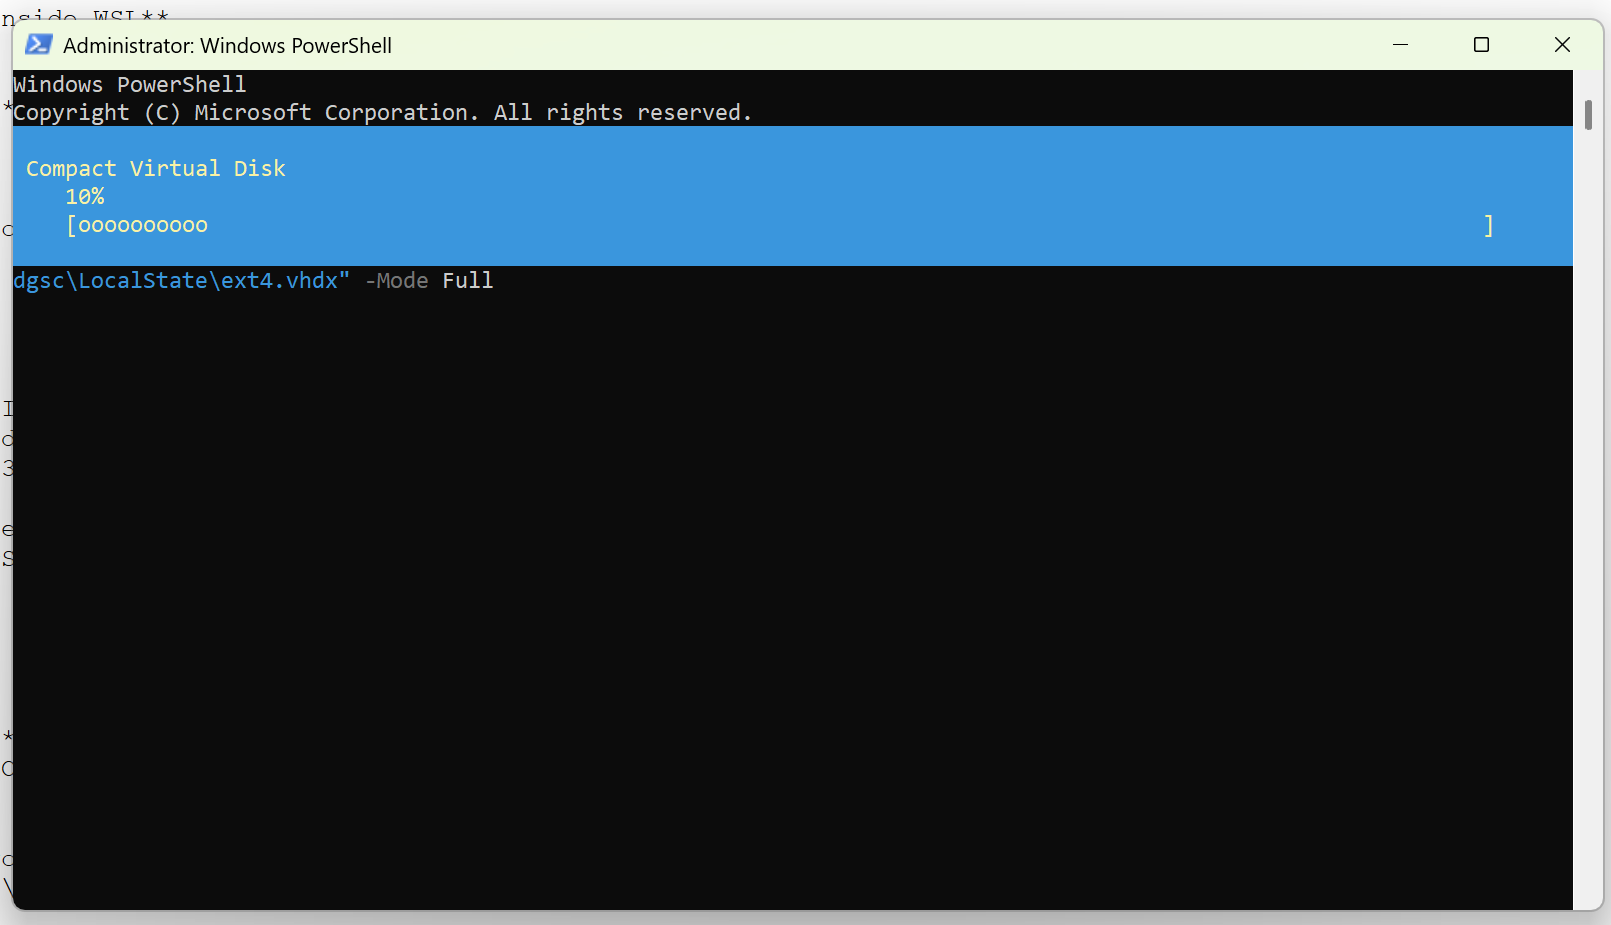
- Compact the VHDX
Option A (best): Optimize-VHD (requires Hyper-V feature / module)
# Run in an elevated PowerShell
Optimize-VHD -Path "C:\path\to\ext4.vhdx" -Mode Full
Use WinDirStat to inspect the windows filesystem and find out which files are taking up most space.
Cleaning up WSL2
rm -rf ~/.vscode-server/data/CachedExtensionVSIXs
rm -rf ~/.vscode-server/data/User/workspaceStorage
npm cache verify
pip cache purge
du -h ~/.cache/pypoetry/virtualenvs -d 1 | sort -hr | head -n 30
Ubuntu Terminal Profile
sometimes the profile gets messed up. here is a copy
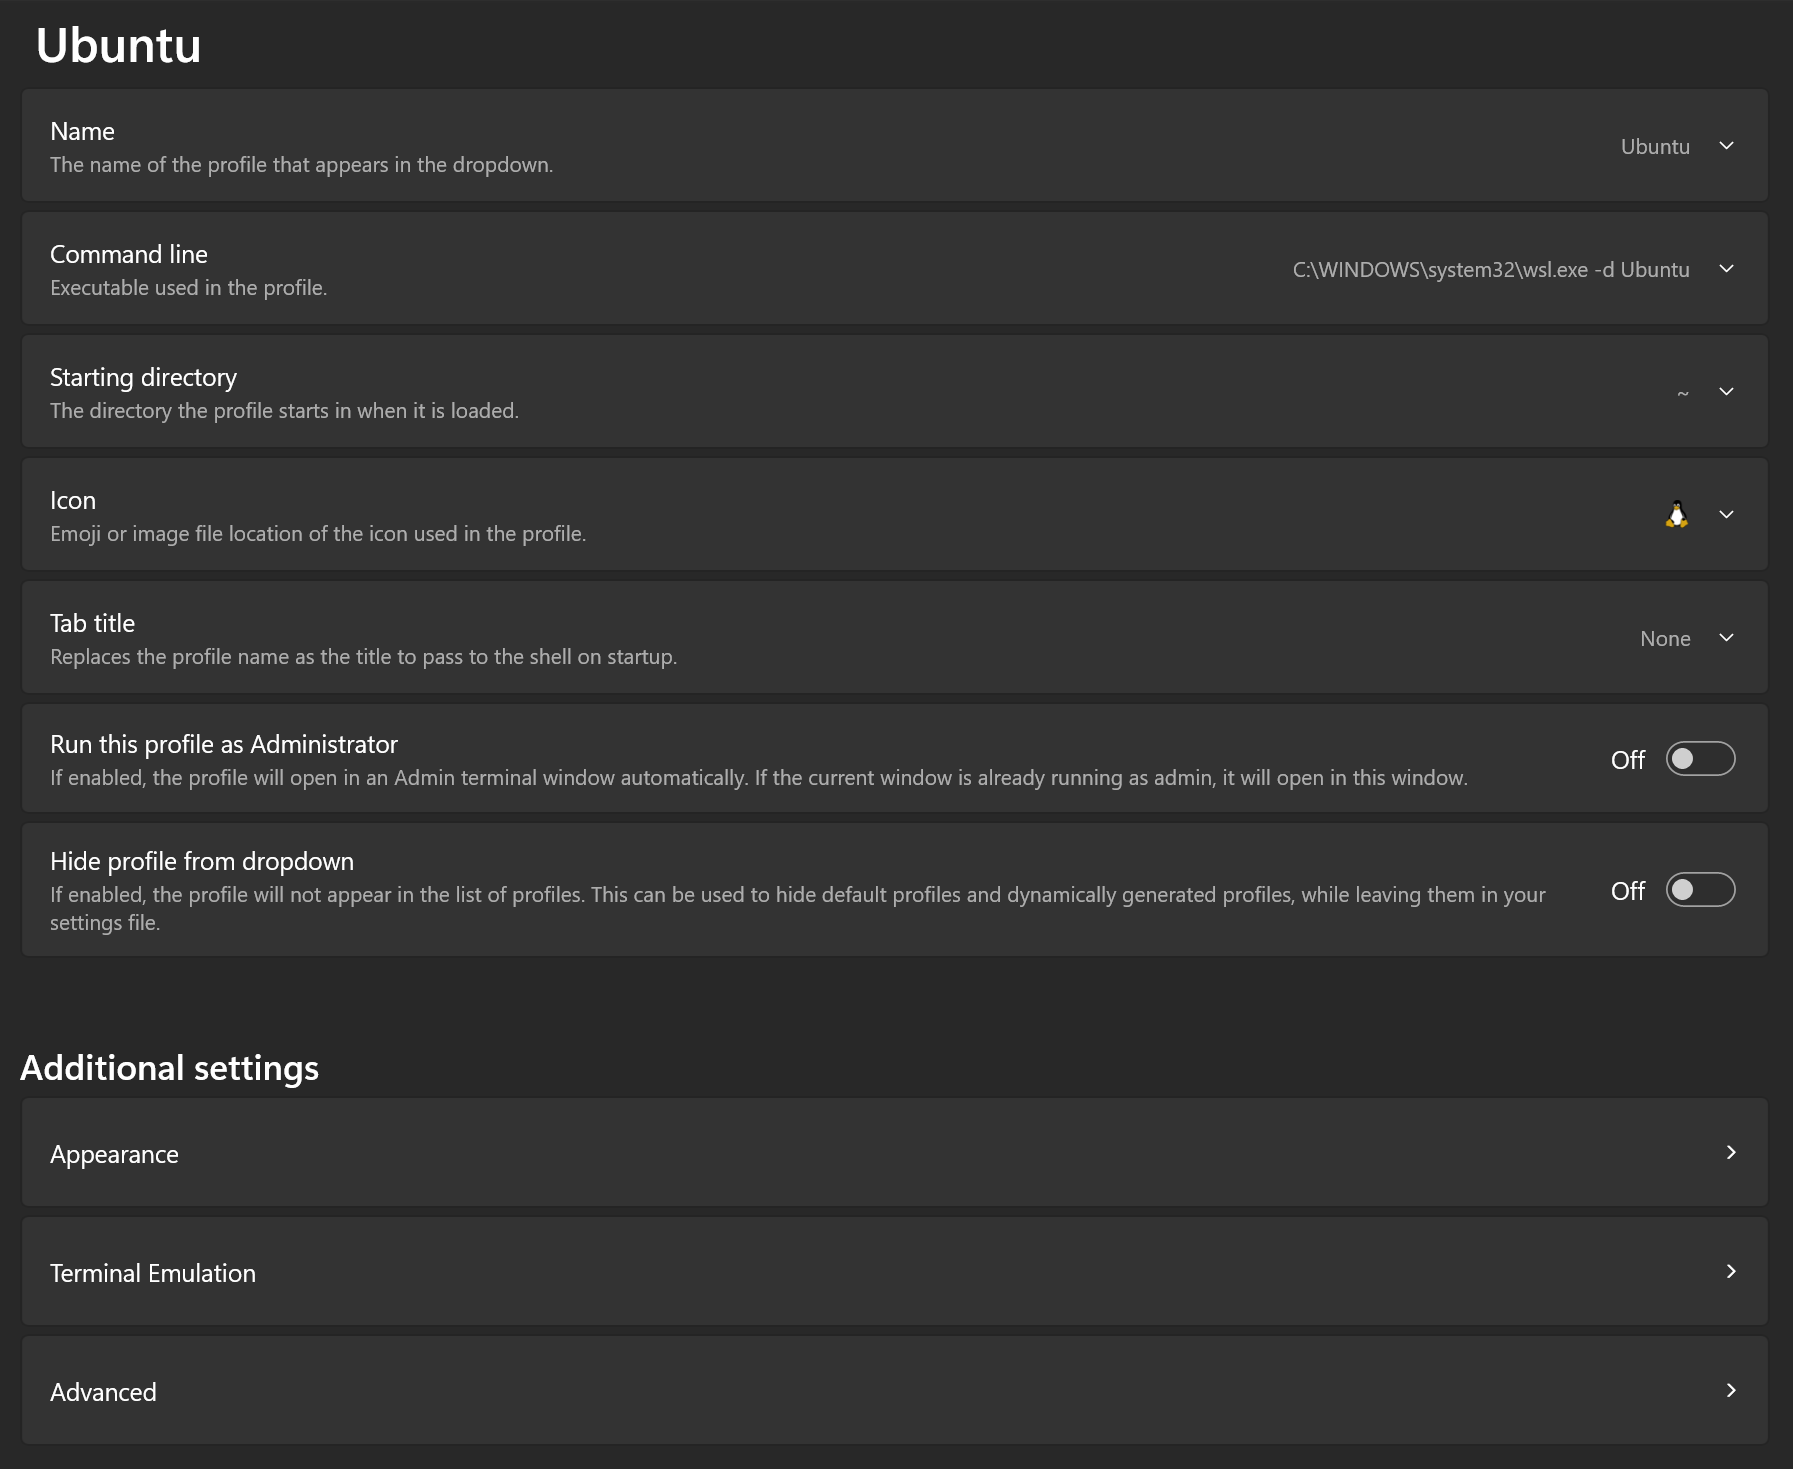
For Icon choose File ms-appx:///ProfileIcons/{9acb9455-ca41-5af7-950f-6bca1bc9722f}.png
