
I apologize in advance for bad formatting. The reason for bad formatting is described here: https://wordpress.stackexchange.com/questions/327170/how-to-avoid-wordpress-com-from-auto-inserting-p-and-span-tags-when-posting-code
Objective: Understand how fabric-ca-server works and run it with user supplied X509 certificate and key.
Lets spin up a docker instance of fabric-ca-server. If you spin up an instance without overriding the entrypoint, the server would already have started because of following code in the fabric-ca docker image:
“Cmd”: [
“/bin/sh”,
“-c”,
“fabric-ca-server start -b admin:adminpw”
]
In this tutorial, since we want to understand how it works behind the covers, we will start it with following command instead:
$ docker service create –replicas 1 –name rca-jnj –network dscsa_net –constraint ‘node.hostname == jnj’ –entrypoint ‘/bin/sh -c “tail -f /dev/null”‘ –workdir /etc/hyperledger/fabric-ca-server –env FABRIC_CA_SERVER_HOME=/etc/hyperledger/fabric-ca-server –env FABRIC_CA_SERVER_DEBUG=true hyperledger/fabric-ca:1.3.0
In above we had already created a network named dscsa_net earlier. The tail -f /dev/null is simply to make it enter infinite loop since otherwise the container will immediately exit. Now we can enter the container like follows:
$ docker exec -it <CONTAINER-ID> /bin/bash
where you can get the CONTAINER-ID by running docker ps. Next verify version
root@da5ee35396e3:/etc/hyperledger/fabric-ca-server# fabric-ca-server version
fabric-ca-server:
Version: 1.3.0
Go version: go1.10.4
OS/Arch: linux/amd64
Next verify there are only 2 files in the /etc/hyperledger/fabric-ca-server directory – ca-cert.pem and ca-key.pem
root@da5ee35396e3:/etc/hyperledger/fabric-ca-server# ls -al
total 40
drwxr-xr-x 1 root root 4096 Jan 31 18:07 .
drwxr-xr-x 1 root root 4096 Oct 10 14:56 ..
-rw-rw-r– 1 1001 1001 887 Oct 10 14:53 ca-cert.pem
-rw-rw-r– 1 1001 1001 241 Oct 10 14:53 ca-key.pem
Go ahead and delete these files. rm *.pem
In a separate terminal window create a file named fabric-ca-server-config.yaml copying and pasting the contents from https://hyperledger-fabric-ca.readthedocs.io/en/release-1.3/serverconfig.html
Edit the file like as described in this SO answer. Make sure to set the version.
Now copy the file to the container using docker cp
Now lets initialize the fabric-ca-server. Run fabric-ca-server init from the container. It will use the settings in fabric-ca-server-config.yaml
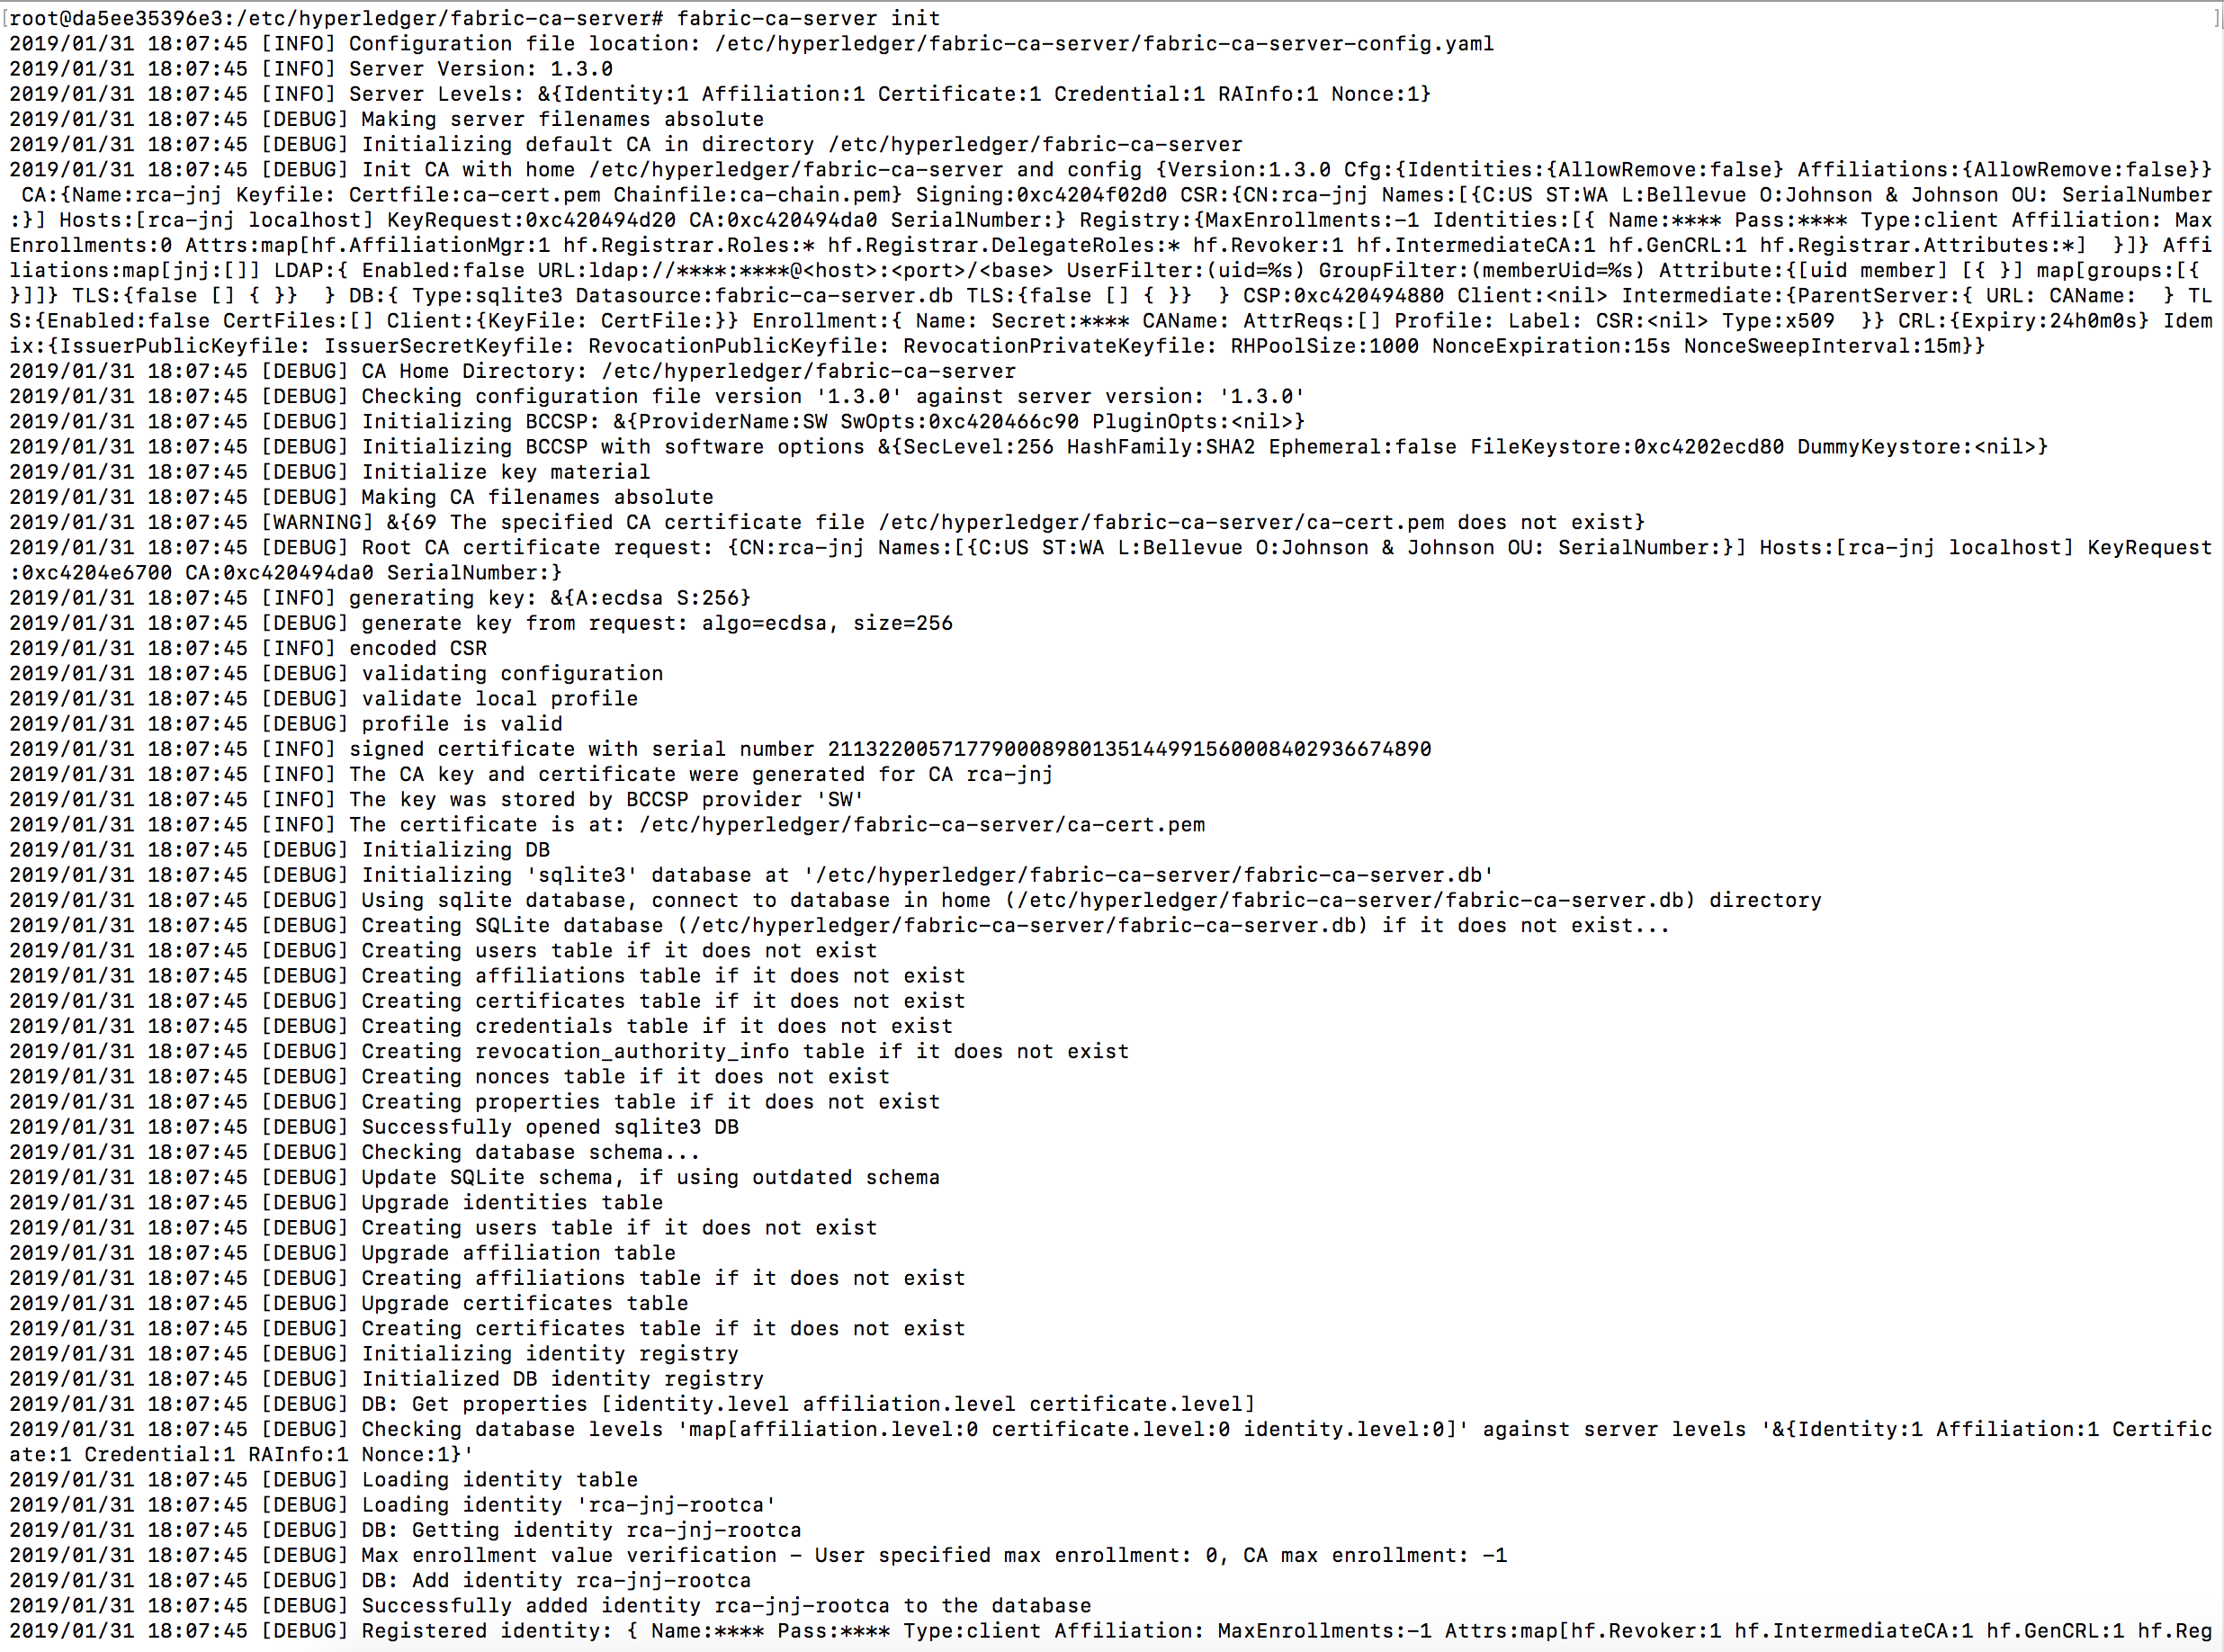
Some important messages in the logs:
2019/01/31 18:07:45 [DEBUG] Affiliation ‘jnj’ added
2019/01/31 18:07:45 [INFO] Initialized sqlite3 database at /etc/hyperledger/fabric-ca-server/fabric-ca-server.db
2019/01/31 18:07:45 [INFO] The issuer key was successfully stored. The public key is at: /etc/hyperledger/fabric-ca-server/IssuerPublicKey, secret key is at: /etc/hyperledger/fabric-ca-server/msp/keystore/IssuerSecretKey
Hopefully it succeeds, and now if you ls you should see something like following:
root@da5ee35396e3:/etc/hyperledger/fabric-ca-server# ls
IssuerPublicKey IssuerRevocationPublicKey ca-cert.pem fabric-ca-server-config.yaml fabric-ca-server.db msp
Crack open the ca-cert.pem by running `openssl x509 -in ca-cert.pem -text -noout` and verify it looks good.
Even though the logs say secret key is at: /etc/hyperledger/fabric-ca-server/msp/keystore/IssuerSecretKey, the private key will be stored under msp/keystore/<long-filename-with-suffix-_sk>
Now copy the public certificate ca-cert.pem and private key file to the host machine using docker cp once again.
Kill the service. docker service rm <SERVICE-NAME>
Next we will restart fabric-ca-server but this time make it use the certificate and keyfile we got above. To do this, we need to edit the ca section of fabric-ca-server-config.yaml like so:

where use the names of your own files.
Next restart fabric-ca-server, delete the .pem files in $FABRIC_CA_SERVER_HOME directory, copy the yaml file and the public-private keys (so total 3 files) over to $FABRIC_CA_SERVER_HOME and run fabric-ca-server init. This time it will not generate new certificate and key and instead use the cert and key that you have supplied. In practice when the server is restarted (e.g., the VM gets rebooted) you will need to use the previous cert and key otherwise the blockchain will not work any more (I am not sure about this. It is to be verified) since the cert in genesis block will not match anymore.
root@684ac3891b78:/etc/hyperledger/fabric-ca-server# ls
IssuerPublicKey IssuerRevocationPublicKey fabric-ca-server-config.yaml fabric-ca-server.db msp rca-jnj.key rca-jnj.pem
You can diff your private key against the keyfile under map/keystore/<long-filename-with-suffix-_sk> and verify they should be the same.
More fun and profit: copy the fabric-ca-server.db to the host. Install sqlite by running $ sudo apt-get install sqlite3 libsqlite3-dev. Then open the db file by running $ sqlite3 fabric-ca-server.db
sqlite> .tables
affiliations properties
certificates revocation_authority_info
credentials users
nonces
sqlite> .schema users
CREATE TABLE users (id VARCHAR(255), token bytea, type VARCHAR(256), affiliation VARCHAR(1024), attributes TEXT, state INTEGER, max_enrollments INTEGER, level INTEGER DEFAULT 0);
do select * from users; to print contents of users table etc.
